First steps with MSP430 in Linux
by Luan
Posted on 21 January 2017, 08:59
The Texas Instruments MSP430 family of ultra-low-power microcontrollers consists of several devices featuring
different sets of peripherals targeted for various applications. In this article I show how to prepare the environment in Slackware Linux and compile, flash and run the first program.
The MSP430 is a mixed-signal microcontroller family from Texas Instruments. Built around a 16-bit CPU, the MSP430 is designed for low cost and, specifically, low power consumption embedded applications.

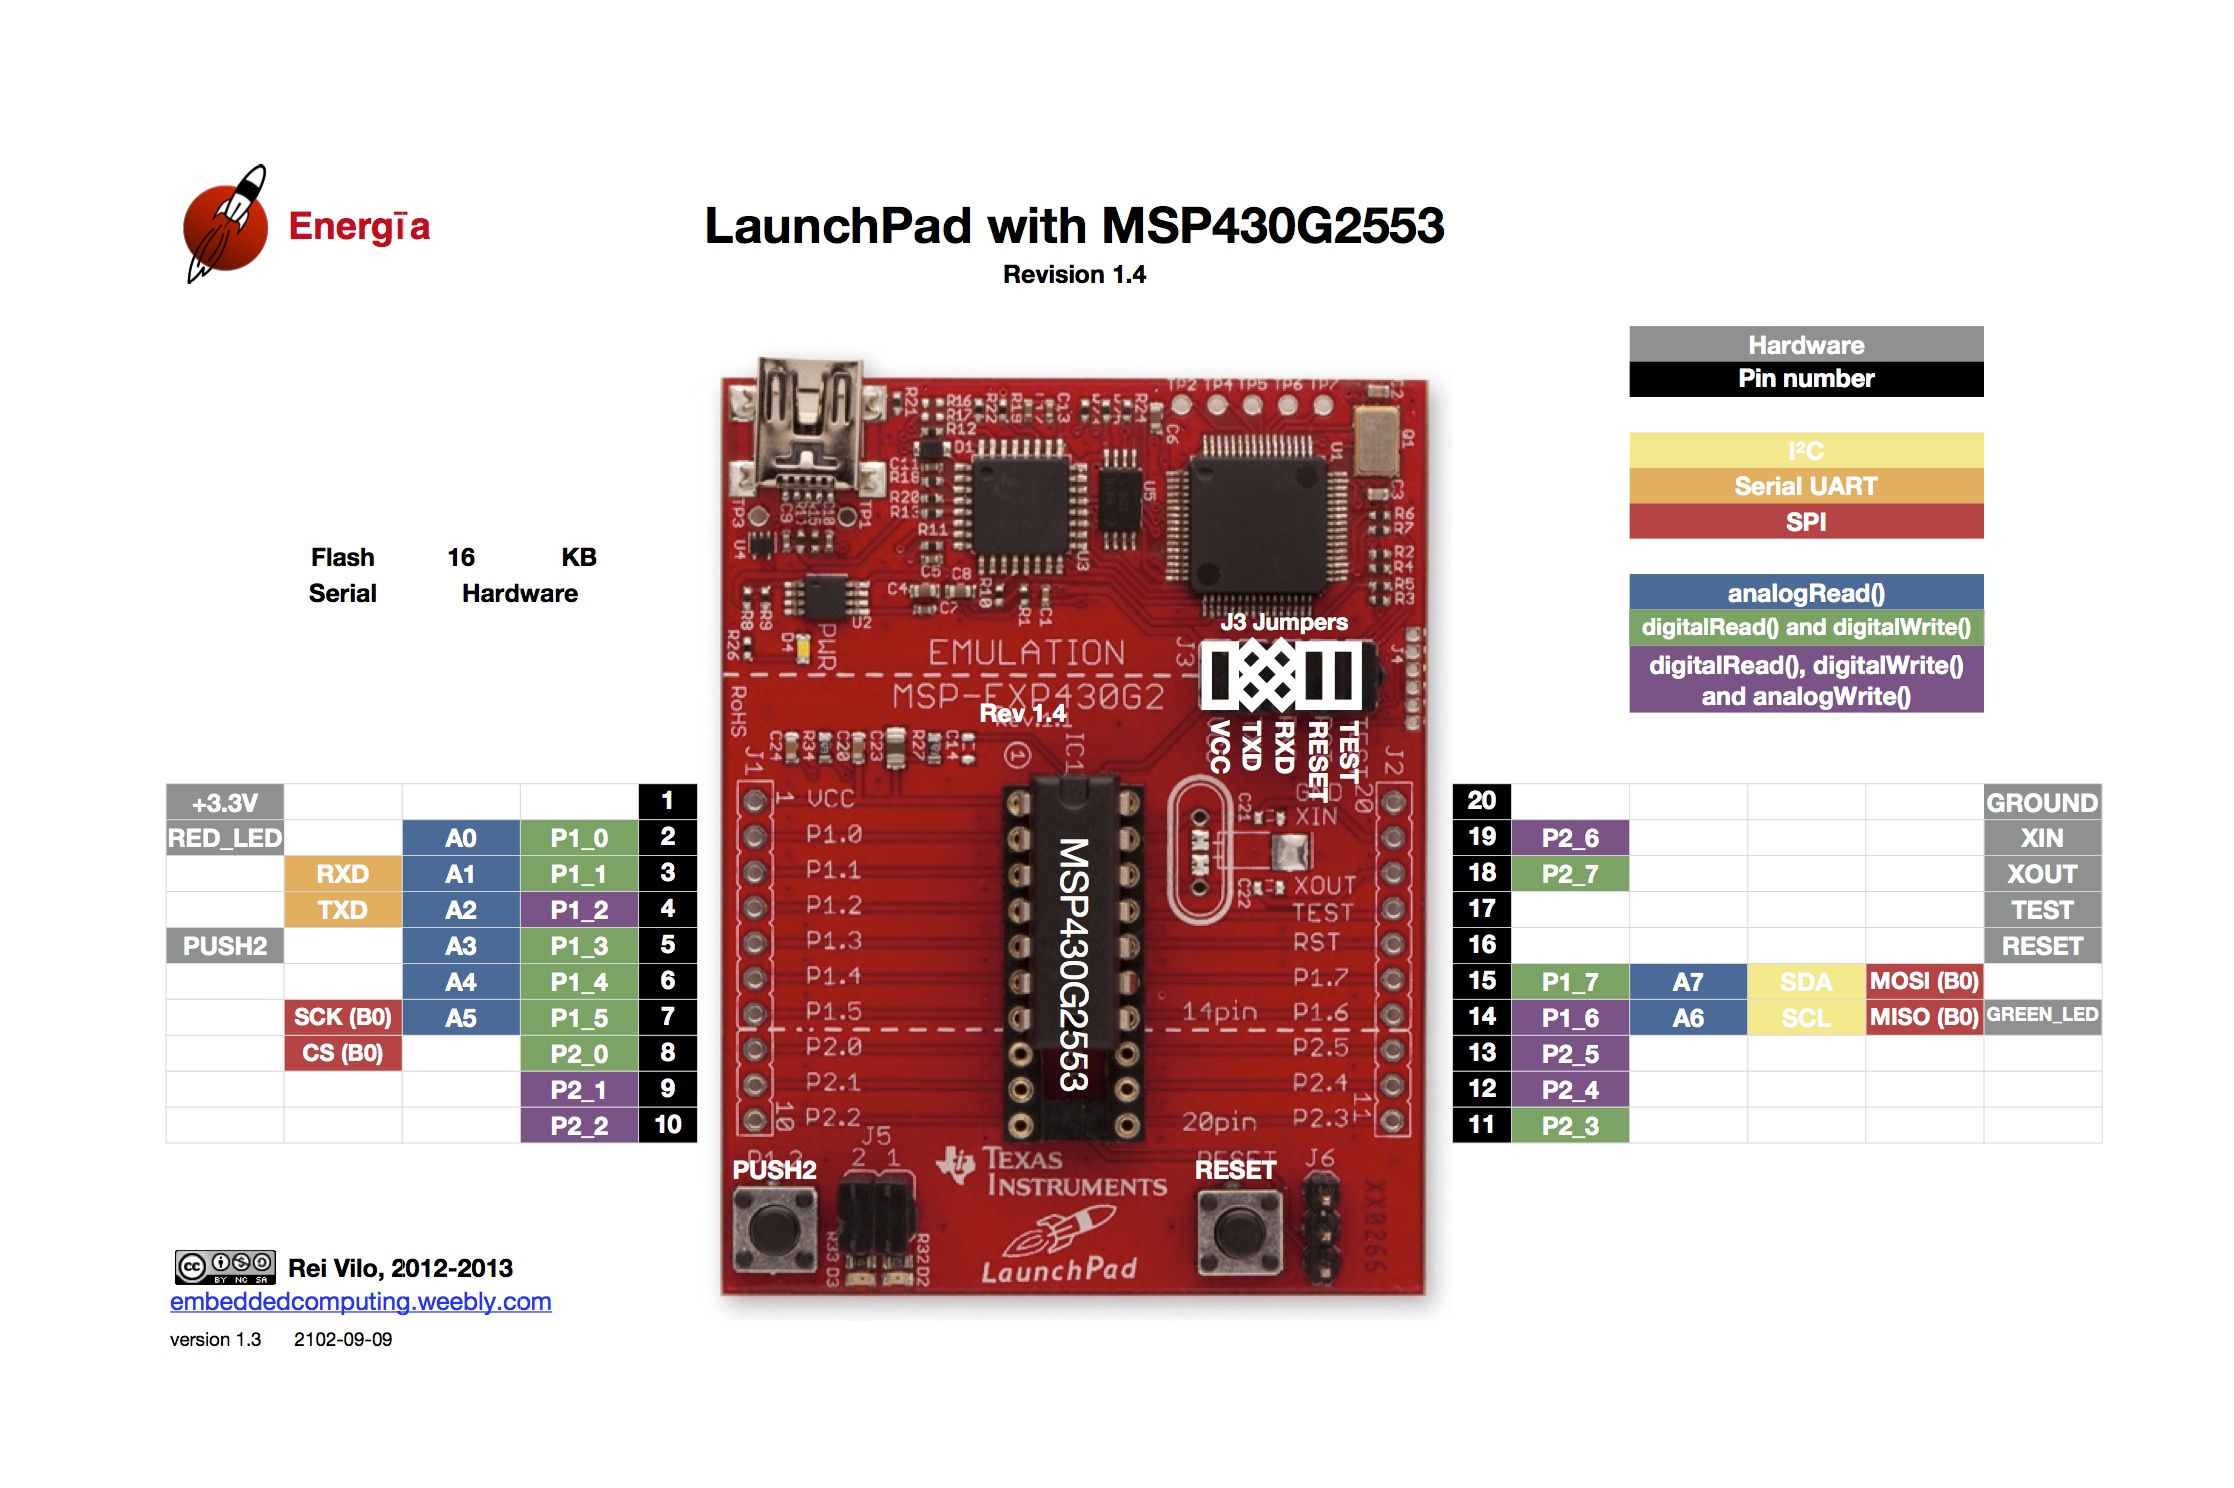
In this article I show how to develop using C language for the MSP430 in Slackware 14.0. For that I used the MSP430 LaunchPad, which cost only $9.99. For compile the code I used the MSP430-gcc and the Mspdebug as flashing tool.
Environment setup
I created a directory tree like Embedded/Msp430 in my home folder to keep the needed files.
mkdir Embedded
cd Embedded
mkdir Msp430
cd Msp430
Instalation of MSP430-GCC
First, download the Linux .run file from TI website. As they say is needed to use chmod +x in downloaded file before run.
Run the instalation script and choose to extract files in directory previously created.
Compilation of mspdebug
Get the mspdebug
wget https://github.com/dlbeer/mspdebug/archive/v0.24.tar.gzExtract
tar -zxvf v0.24.tar.gz Compile
cd mspdebug-0.24/
make WITHOUT_READLINE=1
Adjust the $PATH variable
sudo vim /etc/profileAdd the following code in end of file
# Msp 430 dev in path
export MSP_HOME=$HOME/Embedded/Msp430
export PATH=$PATH:$MSP_HOME/msp430_gcc/bin:$MSP_HOME/mspdebug-0.24
After finish editing, execute the following command
source /etc/profileCompiling the first code
Create a file called blink.c with following content:
// First example msp 430

#include <msp430g2553.h>

#define LED2_MASK       0x40

int main(void)
{
  volatile int i = 0;

  /* stop watchdog timer */
  WDTCTL = WDTPW | WDTHOLD;

  /* set P1 direction */
  P1DIR = LED2_MASK;

  /* leds off */
  P1OUT = 0x00;

  for (;;)
  {
    /* toggle leds */
    P1OUT ^= (LED2_MASK);

    /* delay */
    for (i = 0; i < 10000; i++);
  }

}
And create a Makefile
# Makefile

MCU = msp430g2553
INCLUDE_DIR = $$MSP_HOME/msp430_gcc/include/

IFLAGS = -I $(INCLUDE_DIR)
LFLAGS = -L $(INCLUDE_DIR)

CC = msp430-elf-gcc

CFLAGS = -Os -Wall -g -mmcu=$(MCU)

OBJS = blink.o


all: $(OBJS)
	$(CC) $(CFLAGS) $(LFLAGS) -o blink.elf $(OBJS)

%.o: %.c
	$(CC) $(CFLAGS) $(IFLAGS) -c $<

clean:
	rm -fr blink.elf $(OBJS)
To compile is just needed run make. Is possible to get the code above in github.
Flashing the code
To connect to the chip and flash the code we use the mspdebug. Just is needed to execute:
mspdebug rf2500In the mspdebug prompt:
prog blink.elf
run
Problems
Case you have problems during connection with mspdebug you might add the msp430 rules in udev. To do that create 71-persistent-msp430.rules in the folder /etc/udev/rules.d
sudo vim /etc/udev/rules.d/71-persistent-msp430.rulesAnd place the following content in the file.
ATTRS{idVendor}=="0451", ATTRS{idProduct}=="f432", MODE="0660", GROUP="plugdev"You have to add your user to plugdev group
sudo adduser username plugdevAfter that run
sudo udevd restartAnd try connect again.
This is just the beggining steps that I wanted to share. After I gonna show more useful and complex examples using the MSP430 and also other microcontrollers.
Category MSP430
Comments
Enter your comment below. Fields marked * are required. You must preview your comment before submitting it.
Search
About
I am computer engineer and MSc in Informatics graduated in Federal University of Espírito Santo. I am a programming and electronics enthusiast and I made this site to share my ideas and experiments in programming, electronics and DIY. I hope you enjoy it.
Donate: monero

452LPJcRqkhiaMdwpJSrzY1CTQ6MQMDxxQkUwDHDjBCe3Pcb6p9dHnGBZYjhZX1gHGU86W8wunHJBVDx5bk2K2aoFYwSA36